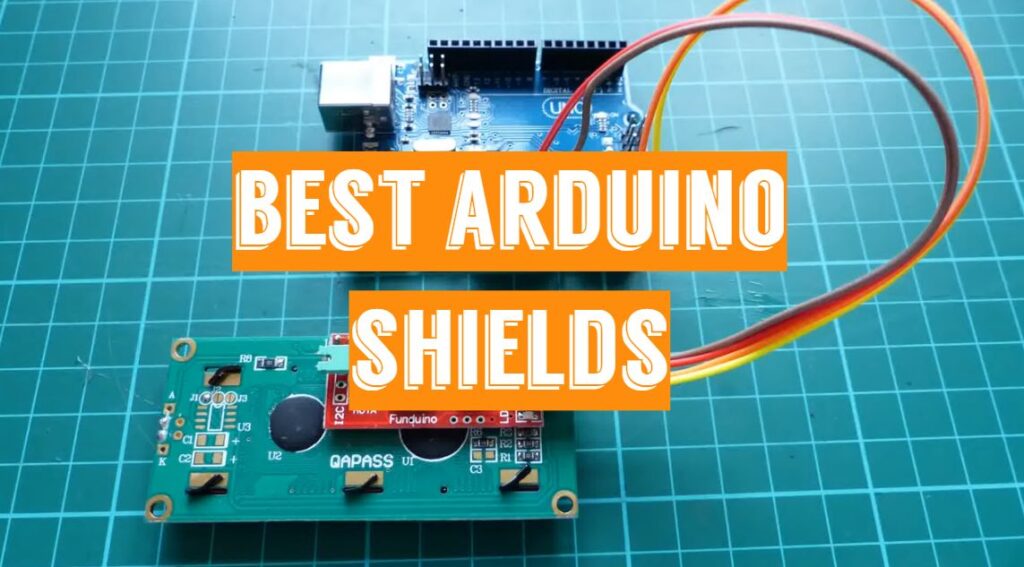
Customer’s Choice: the Best Rated Arduino Shields
[survey_answers id=”1751645471″ style=”plain” data=”score”] users answered this survey. Please help us improve this review!
[survey_answers id=”1751645471″ style=”piechart” legend=”true”]
An Arduino shield is as the name implies, a board that plugs straight into a microcontroller. Such a shield is intended to extend functionality. As such, specialized uses are featured on these Arduino compliant circuit boards. For e.g., some might add networking features, while others may have sensors on board. Like the Arduino itself, Arduino shields are cheap but extremely useful.
Shields are hardware components that sit on top of your Arduino project and offer certain functions to improve the basic interface. For e.g., to make it simpler to attach and monitor engines or even to transform your Arduino into anything as complicated as a cell phone, you can use a specific shield. A shield can begin as an interesting piece of hardware that has been experimented with by an enthusiast and wants to share with the community. An experienced person or company) can develop a shield to facilitate an application based on the Arduino community’s demand.
Any Arduino board is an impressive device for any project on its own but combining it with a shield extends its capabilities and takes the framework to a new standard.
Reasons to use Arduino shields:
- No need to worry about the circuity. A top-notch shield includes all the necessary components;
- Easy to attach and detach;
- Fewer errors than connecting the separated parts;
- Neatly packaged in the equal footprint as an Arduino board;
Do you want to know what Arduino shields are really worth your attention? Check individual reviews of top 5 Arduino shields. The comparison table and buying guide are also quite helpful.
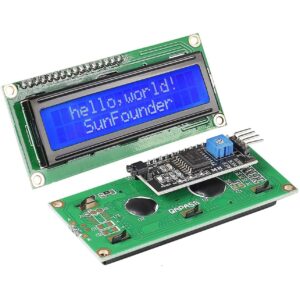
SunFounder IIC I2C TWI 1602 Serial LCD Module Display – the best for display tests!
The LCD1602 module is easy to manage with an I2C port. There are only two bidirectional lines of data, one serial data line and one serial clock. With the IIC/I2C interface, only two I/O ports are needed, saving more for other uses.
With the potentiometer at the rear, you may change the contrast. You may also unplug the jumper cap on the back of the LCD if you do not want the backlight.
Pros
- Top-notch LCD;
- IIC protocol is supported;
- Easy to install and set up;
- Good build quality;
- Easy to set up and integrate;
- Open-source library;
Cons
- More expensive than some Arduino boards;
- Library files are outdated;
You can view whatever you like with the LCD shield by programming the Arduino or Raspberry Pi board code. Hence to make your design more exciting, this is a great pick.
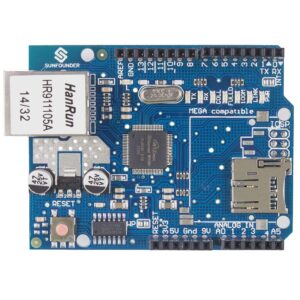
SunFounder Ethernet Shield W5100– the best for Internet projects!
For the Arduino module, this Ethernet Shield may be used to link to the internet. You can use it as a client or a server. It is also compliant directly with the official Arduino Ethernet Library.
It includes a micro-SD card slot that can be used to store data across the network for operation.
The shield fits any Arduino Duemilanove (168/328) and Mega (1280/2560) and it can be accessed from the SD library. And it enables up to four-socket connections concurrently.
Pros
- Powerful Ethernet shield;
- Stable connectivity;
- 4 sockets;
- Affordable;
Cons
- Replica;
- Issues with an SD card reader;
- Difficult to install;
This shield functions exactly as it should and it integrates with any router well. It’s not really cheap, but it’s worth the cost since it also comes with a mini-SD card slot. Highly suggested for Arduino boards if you’re searching for a good performing Ethernet shield.
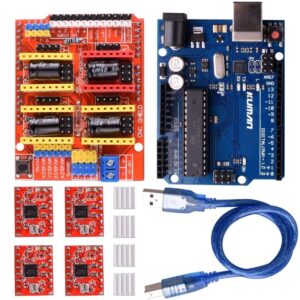
Kuman CNC Shield Expansion Board V3.0 – the best for proof-of-concept projects!
This Kuman CNC shield is an expansion board for quick proof-of-concept prototype development. One of the best shields for beginners. This package comes with all the jumpers required for the phase resolution to be configured. Find the full-step mode checking.
Programming is normal C and a number of samples come with the Arduino IDE. There are various repositories open.
It is really cheap and quick to use these shields. Applying a 9VDC battery and a barrel adapter, they can be run without the PC until programmed.
Pros
- Decent flash memory;
- Affordable;
- Simple and easy to use;
- Compatible with official Arduino processors;
Cons
- Can be supplied without jumpers;
- USB connectivity issues;
- Doesn’t include the guidelines;
This shield functions as well as anyone would expect it to function. Before using it, make sure to change the current so that you do not destroy the stepper motor. Many online guides, sketches and tutorials make things easier to execute.
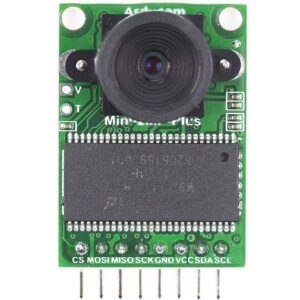
Arducam Mini Module Camera Shield – the best for digital cameras!
Arducam 2MP Plus is an improved variant of the Arducam shield Rev.C. This 2MP SPI high-definition camera eliminates the flexibility of the configuration for camera operation. It offers a miniature scale, a hardware interface that is simple to use and an open-source code library.
Not only does Arducam include the option to install a camera interface that other low-cost microcontrollers do not provide, but it also provides the ability to add several cameras to a single microcontroller.
The Arducam is basic enough that it can be comfortably used with an Arduino, but this simple interface allows it possible to combine the Arducam with other single board PCs such as the Raspberry Pi and the Beaglebone.
Pros
- Good little camera;
- Easy to use for beginners;
- Small size;
- Compatible with Raspberry Pi, MCU, ARM, FPGA, DSP platforms;
Cons
- Not fully IR sensitive;
- Quite flimsy;
- Code is not included;
For those wanting to integrate digital cameras into their jobs, these devices are suggested. The Arducam itself is a special device, but its biggest advantage is that regardless of the axle you are twisted around it transforms the cameras themselves into a product, just another component of the project.
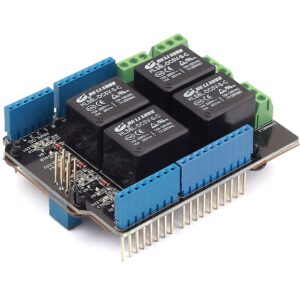
Seeedstudio Relay Shield v3.0– the best for relay projects!
Seeedstudio’s Relay Shield uses four high-quality relays and offers NO/NC interfaces that manage the high current load. This nice workaround hardware is for manipulating devices that Arduino Digital I/Os could not explicitly monitor.
The uniform shield form factor helps the Arduino to be attached smoothly. The shield also has 4 dynamic indicators displaying each relay’s on/off status.
Pros
- Good price;
- Great build quality;
- Compact;
- Each relay has status indicators;
- Simple to code;
Cons
- Small wire terminals;
This shield is one of the best robotics components you may get for such a price. It can easily become an irreplaceable detail in your Arduino kit.
The Buyer’s Guide
Arduino shields can be easy or intricate. They are distributed either pre-assembled or as kits. Products allow you to assemble the Arduino shield more freely, as you need it to be. Some kits enable you to assemble the boards’ circuitry, while more complicated shields can already be assembled to a large degree, requiring only header pins.
Shields allow you to apply your board for more than one reason and to quickly modify the purpose. They pack the electronics tightly in the same footprint as an Arduino for that circuit and are stackable to combine various functionalities. But on an Arduino, they all need to use the same pins, so if you’re piling shields, look out for those that require to apply the same pins. The GND pins are always connected, too, since any contact between your Arduino and another computer requires a common GND.
The bare amount of shields accessible for Arduino devboards is overwhelming, and they can stack on top of each other with all these many shields. While shields are not needed for any project (a setup with jumper cables or even your shield could be customized feasibly), they can be extremely helpful.
Types:
- Touchscreen. Few shields incorporate the sort of feature that a full-color touchscreen should;
- Xbee shields. Standalone microcontroller devices are excellent, but the inclusion of the Xbee radio protocol provides Arduinos with wireless networking capabilities;
- Cellular shields. Offering the Arduino mobile phone capability is another cellular option. A cellular shield does exactly that, adding to the Arduino the functionality of SMS, GSM/GPRS, and TCP/IP;
Deciding factors
Take a closer look at such specifications when choosing an Arduino shield:
1) Size (dimensions)
Some shields simply don’t work on top of each other. The underside of every board on top of it can be reached by components larger than the header sockets. If a link is made that shouldn’t be, this condition, which may trigger short circuits, can severely harm the boards.
2) Power requirements
A lot of power needs certain electronics. While the usage of the same power and ground pins is all right for shields, there is a restriction on the power current that may pass into the other pins of input/output (I/O). Usually you may choose among such options – 40mA per pin and 200mA max among all I/O pins.
Exceed this option and you run the risk of your board and every other connected shield getting severely harmed. In certain situations, by charging the Arduino board and shields from an external power source, you can effectively fix this issue so that the current is not passing into the Arduino. If you’re connecting with a board using I2C, SPI, or serial, make sure to use a standard GND.
3) Pins
Certain shields enable certain pins to be included. It’s necessary to ensure that shields on the same pins do not double up. The hardware would only be puzzled in the best case; you may submit voltage to the wrong position in the worst case and destroy your board.
4) Software
Relevant libraries require any of these shields to function. In libraries depending on the same features, there may be clashes, so make sure to read up on what is needed for your shield. Only because a shield is compliant with both the pin and the voltage associated with an Arduino devboard doesn’t really indicate that the libraries can function with that shield.
This could occur since the Arduino library is not applied by many libraries to evaluate I/O pin numbers and hardware use. Instead through registers that are special to AVR or ARM cores, the libraries access the hardware directly. While this contributes to an improvement in efficiency, it also ensures that a library written on the Uno can’t function on the Due board.
5) Electrical/radio interference
Your shields could interact with each other if they use some form of RF communication. WiFi shields, for example, contain a transceiver to connect at about 2.4GHz, meaning you are likely to have issues if you have another 2.4GHz system jammed up against it on a neighboring shield.
A concern can also be electrical noise. A worst-case scenario will be to pair a shield that involves an incredibly sterile electrical atmosphere with a shield that produces a lot of electrical noise, such as a motor driver shield, such as a high-speed/high-resolution analog to digital converter. If electrical noise is a concern, adding external power supply decoupling condensers to each board will also aid.
Video Tutorial: How to Connect an I2C Lcd Display to an Arduino Uno Tutorial
Final thoughts
Arduino shields are quite helpful for bringing additional capabilities to Arduino, keeping circuitry easy or making your projects more portable. Any of the mentioned shields can be used in entry-level and advanced projects.

Arduino shields are great because they’re really easy to use. All you have to do is plug them into the Arduino board and that’s it!