Customer’s Choice: the Best Rated Arduino Boards
[survey_answers id=”1956890294″ style=”plain” data=”score”] users answered this survey. Please help us improve this review!
[survey_answers id=”1956890294″ style=”piechart” legend=”true”]
Arduino has been applied in thousands of various initiatives and programs, due to its quick and open-source interface/hardware. For beginners, any Arduino board is simple-to-use but versatile enough for experienced users and great boards for IoT.
An Arduino board is a crucial instrument for discovering new things. Anyone – teenagers, hobbyists, musicians, programmers – may start tinkering by following a kit’s step-by-step directions or by exchanging ideas with other members of the Arduino community.
Pros of Arduino boards:
- Simple working with microcontrollers;
- Versatile and made for beginners among students, teachers and DIYers;
- Affordable;
- Cross-platform and open-source software. It supports the operating systems: Windows, Mac OS, Linux, etc.;
- Clear development environment thanks to the Arduino Software (IDE);
- Advanced hardware. In order to learn how it functions and save money, even comparatively novice users may create the module’s breadboard edition;
Make sure to check the buying guide and comparison table below to find the best arduino board according to your preferences for size and features.
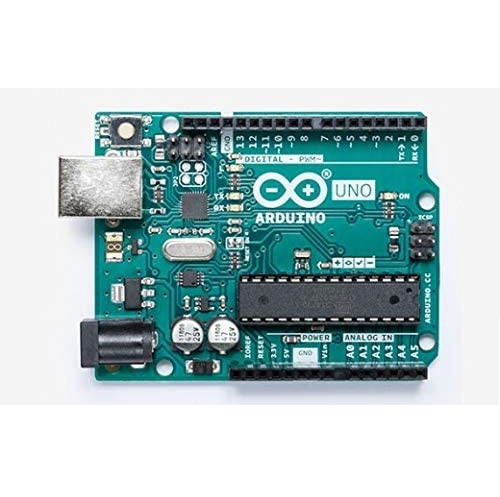
ARDUINO UNO R3 – the best for beginners!
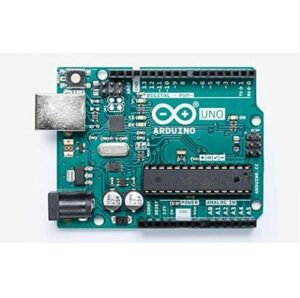 The Arduino UNO R3 board is open-source hardware, but using the files accessible on the Arduino website, you can create your board.
With IDE tools, the UNO board can be configured. You can pick from any Arduino on the system menu, based on the microcontroller on your board.
Through utilizing the initial STK500 protocol, the ATmega328 microcontroller on the Arduino Uno board communicates.
A CD with a detailed guide is provided, and the code for how to use the different modules. Modules are pre-soldered and require clear wiring.
There is a premium-feeling acrylic case complete with rational and carefully stored bits and components in separate compartments. The approach to holding your Arduino projects coordinated is a solid one.
Pros
- The basics are explained;
- Many accessories included;
- Includes Arduino lessons and libraries;
- Easy to set up;
- Quick deployment of testing environments;
- Includes a storage case;
Cons
- Free software download is not available;
- Dated use guide;
- Pricey;
This board is your gateway to the special Arduino experience: perfect for understanding the fundamentals and an important platform for your quick prototyping needs.
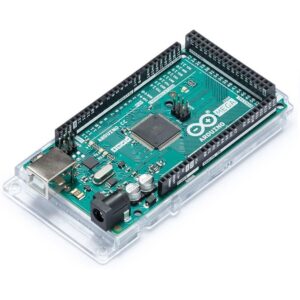
Arduino Mega 2560 REV3 – the Most Powerful Arduino!
The Arduino Mega 2560 is built for the most creative projects that need extra pins and extra memory and power.
It could be a perfect option for smaller DIY ventures that need room to grow, the Arduino Mega 2560 R3.
It contains all the microcontrollers required to support; only attach it to a device with a USB cable or power it to get started with an AC-to-DC adapter or battery. Most shields developed for the Arduino Uno, Duemilanove or Diecimila are compatible with this Mega board.
For all current shields, the Mega 2560 R3 fits but will adjust to new shields that use these additional pins.
Pros
- Many pins for IoT modules;
- 4 UART terminals;
- Compatible with most shields;
- A lot of memory;
Cons
- Expensive;
- Lacks some turnkey features;
In terms of the amount of pins or header contacts, board size and memory size, a 2560 board is simply a larger Arduino Uno. Except for the price, all the benefits of the Arduino Uno refer to the Mega 2560.
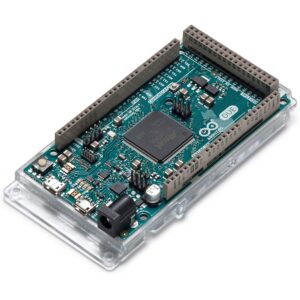
Arduino Due– the best for flash memory size!
Arduino Due is a microcontroller board focused primarily on the Atmel SAM3X8E (32-Bit ARM microcontroller). Compared to Nano or Uno, it is a large module and it comes with more pins and memory space compared to them.
Using a standard Arduino Software (IDE), which is compliant with all Arduino boards, the Arduino Due can be configured and can function both ways: online and offline.
Pros
- Fast processor;
- Cheaper than the Mega board;
- Improved flash memory;
- Large;
Cons
- Limited 3.3V pins;
- No IoT features;
Arduino Due is bulky, but it covers vast spaces and is used in a wide variety of applications where the necessary outcome is high processing speed.
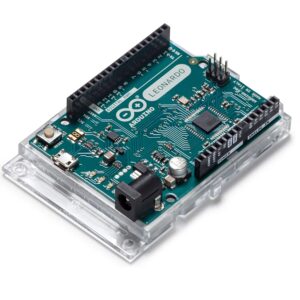
Arduino Leonardo with Headers– the best for USB compatibility!
For a link to your PC, the Arduino Leonardo header board uses a Micro-B USB cable, which is a move apart from the USB Type-B connectivity featured in Uno.
What makes it distinctive from other Arduino boards is the inbuilt USB 2.0 connectivity. Through this, the Leonardo will connect directly through USB with your PC, enabling it to function as a mouse or a keyboard. It opens up the potential for even more fascinating applications with the assistance of the Keyboard Library.
If you require a few more IO pins, USB keyboard or mouse identification, as well as all the characteristics of a Uno board, then the Leonardo could be just what your project wants.
Pros
- Has many analog and digital pins;
- Has a microUSB instead of a USB-C port;
- Cheap but powerful ATMega microcontroller;
- Includes headers;
Cons
- Not compatible with some shields;
- Limited features;
- Lacks IoT functions;
A good place to begin is the Arduino Leonardo Board. Starting up on the board is not a challenging challenge since by Arduino IDE, it is relatively close to other Arduino boards.
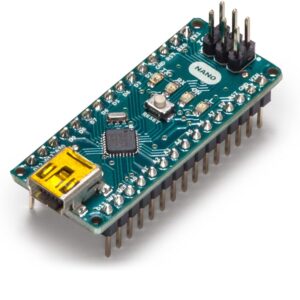
Arduino Nano– the best for breadboards!
Slightly smaller than the Mini, the Arduino Nano is similarly built to work on a solderless breadboard. The Nano, though, operates on the same processor used in the Uno, the ATmega328 MCU.
With the same barrel jack-less configuration as the Nano, it uses a Mini-B USB socket.
Surprisingly, there is more RAM on the Nano than on the Mini. This is attributable to the bootloader on the ATmega328 being smaller. The identical boards with distinct cores are the Micro and the Nano modules.
The Nano is a lightweight board ideal for nearly all DIY electronic designs, but there is a broad variety of Arduino boards to choose from. These tiny microcontrollers allow the production of portable DIY hardware accessible to more individuals than ever before.
Pros
- Affordable;
- Good for novices;
- Tiny for small projects;
- Functional;
- Simple prototyping;
- Includes a mini-USB cable;
Cons
- Limited IoT uses;
- Limited memory;
The Arduino Nano is the Arduino Uno’s “little brother” that shares much of its features. Other than its smaller scale, the biggest distinction being the USB connector, with the Nano connected via a micro USB cable to your device.
To study hobby electronics and programming on it is a perfect microcontroller, and its size makes it ideal for building into projects that need a limited form factor.
The Buyer’s Guide
Uses
Arduino is a very flexible brand for newcomers alike. It has a broad variety of uses that are special and it might not be feasible to mention each of them.
This is how you may use Arduino boards:
- Create your own, affordable 3D printing software;
- Build robots, at least a basic frame with motors and sensors;
- They are good for tracing sound, lasers and other laser-related projects;
- Learn how to code and create a mini PC with various options;
Size
You may want to place an Arduino board in a tiny robot or large PC, etc. Then in choosing the Arduino module, scale becomes a significant consideration. Fortunately, Arduino has several size options.
While shield-compatible Arduino boards are rarely tiny, many small boards have been built by Arduino to solve this question.
The size of a coin is how little an Arduino board can be. It has no header for the screw, which makes it very small. It has a micro USB port that can be powered on using a single lithium cell. LILYPAD Simple and LILYPAD USB are the best boards for you if you choose to provide more pins (up to 10) on large boards.
There is no pin header for these boards and they can be inserted into clothing. Pro Mega, NANO, and MICRO modules are the last choice if you also want more from your little Arduino board.
Interface
This is how you wire up the Arduino board for programming on your machine. Some boards have an on-board USB jack, so all you need to do is attach them to a USB cord. Others have a header usable such that an FTDI basic breakout or FTDI cable can be plugged in.
Other boards, such as the Micro, break out the programming serial pins but are not pin-compatible with the FTDI header.
Any module that has an onboard USB jack also has certain other hardware that makes the switch from serial to USB. However, certain boards don’t require extra hardware since their microcontrollers have built-in USB support.
Major processor types:
- ATMEGA328. There are 2 running voltages, 3.3 and 5 volts, on this 8-bit processor. A 16 MHz oscillator is used with boards with 5 volts operating voltage, and boards with 3.3 operating voltage have a 8 MHz oscillator as more energy is consumed by a 16 MHz oscillator. In the Arduino boards specified, this processor is adequate for daily usage and link to simple modules;
- ATMEGA32U4. On LEONARDO, Mini, LILYPAD USB, and YUN boards, this microcontroller is included. In terms of memory and speed, with SRAM just growing from 2 to 2.5 kB, it’s not quite distinct from ATMEGA328. The primary distinction is the USB protocol’s inclusion. Since the USB converter IC is no longer needed, the price is more beneficial. More PWM and ADC pins relative to ATMEGA328 boards are another significant distinctions;
- ATMEGA2560. If you are searching for a more efficient processor with a higher GPIO count than UNO, then one of the most appropriate choices is the Arduino Mega module. MEGA is the only Arduino board to gain from the 8-kilobyte SRAM, 4-kilobyte EEPROM memory and 256-kilobyte flash in the ATMEGA2560 microcontroller. Its microcontroller features 4 ports for serial connectivity;
Components and features:
1) Microcontroller (MCU)
The core (or more accurately, the brain) of the board is the microcontroller. The Arduino development board is focused on numerous kinds of AVR microcontrollers, each of which has different functions and characteristics.
2) Input voltage
For the board, this is the proposed input voltage set. For a maximum voltage, the board can be rated, but this is the safe working range. A useful point to bear in mind is that all of the Li-Po batteries we bring are 3.7V, which ensures that you can directly control any board with an input voltage of 3.7V from one of our Li-Po batteries.
See how you can power these boards using a battery pack.
3) System voltage
This is the board’s device voltage, i.e. the currently running voltage of a microcontroller. As the logic standard is now 3.3V instead of 5V, this is an important consideration for shield-compatibility. You really want to make sure that whatever external device you’re attempting to interact with is able to fit your controller’s reasoning standard.
4) Clock speed
This is the microcontroller’s operating frequency which is connected to the level at which it will perform commands. Most ATMega microcontrollers operating at 3V will be clocked at 8MHz, but there are occasional cases, although most running at 5V will be logged at 16MHz. Through a few tricks, the clock speed of the Arduino board can be broken down for power savings if you know what you’re doing.
5) Digital I/O
This is the amount of knocked out optical input/output (I/O) pins on the Arduino circuit. It is possible to customize each of these as either an output or input. Some are PWM capable, and some are double pins for serial communication.
6) Analog inputs
This is the number of analog input pins on the Arduino board which are available. Applying the analog-to-digital converter (ADC) on the ATMega chip, analog pins are called “A” followed by their number, enabling you to interpret analog values. It is also possible to customize analog inputs as more optical I/O if you require them.
Flash memory size
This is the sum of software memory the chip accesses for your sketch to hold. Not all of this capacity is usable since the bootloader uses up a very limited part of it (usually between 0.5 and 2KB).
Which Arduino board is great for learning?
Arduino definitely helps to build stuff that one might have achieved before with far greater precision and pace. The most widely used is Arduino UNO and there are other versions that can be adapted to a particular use.
Setup and try some basic experiments with the Arduino programming software that is accessible on their website. Understand how it functions in the code. You would note the resemblance if you already knew C/C++.
First of all, realize that Arduino is not just a language for programming – it is an ecosystem for development. You’re not going to use Arduino to create applications. Based on certain inputs from your sensors, you’ll use it to execute a single, repetitive operation.
That said the easiest way to program an Arduino effectively will be by first mastering C/C++. Knowing the fundamentals of microcontrollers and certain specific electrical concepts involved in the design of circuits is also helpful. Then, consider how some of the sensors work, their ranges of output value, etc.
Video Tutorial: Arduino (Uno R3) Starter Kit Unboxing and Review
[embedyt]https://www.youtube.com/watch?v=aYo7sxhq3Xg[/embedyt]Final Thoughts
Arduino boards are so exciting and intriguing. The great thing about it is that it is ideally appropriate for all those who are making the first small steps in the world of robots, CNC and other complex and daunting work.
All the above-mentioned Arduino boards are associated with innovations and end-usage, you won’t make a wrong choice when buying one of them.


I bought the most powerful Arduino! It’s the Mega 2560 r3. It has a whopping 256 KB of flash memory and 8 KB of SRAM, which is more than enough for any project. You might be wondering how much it costs because, after all, 256 KB is a lot! Well, I bought it for just $40.30 on the official website!