Customer’s Choice: the Best Rated Solder Suckers
[survey_answers id=”1495669799″ style=”plain” data=”score”] users answered this survey. Please help us improve this review!
[survey_answers id=”1495669799″ style=”piechart” legend=”true”]
A quality solder sucker is a quintessential part of any home soldering setup. These small, inexpensive tools are used to remove unwanted solder. They’re also essential for the process of desoldering a joint. Most solder suckers consist of a plunger or vacuum. These mechanisms are usually housed inside a small cylindrical tube that has a pointed tip on one end. While it can be difficult to distinguish one solder sucker from another, it doesn’t take much to reveal a solder sucker’s strengths and weaknesses.
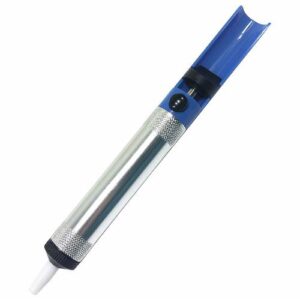
Electronix Express Solder Sucker Desoldering Pump – Best Budget Pick
 The Electronix Express Solder Sucker does a great job of removing hot solder from circuit boards. The pump’s efficient plunger sucks up the hot substance before it has the chance to cure. The sucker’s durable metal body can withstand plenty of heat and action.
While the nonstick nylon tip needs to be replaced periodically, it is considerably strong.
We were satisfied with the pump’s streamlined design. For one, it enables users to perform comfortable one-handed sucking operations. It’s also super lightweight and compact. As such, you can easily stow it away in a toolkit or take it on the go. Overall, the Electronix Express Solder Sucker is a budget-friendly device that’s perfect for amateur soldering setups.
Pros
- Durable metal exterior
- Pump with precision tip
- Offers one-handed use
- Replaceable nonstick silicone tip
- Lightweight and portable
Cons
- Plastic parts melt and degrade easily
- Plunger springs forward rapidly
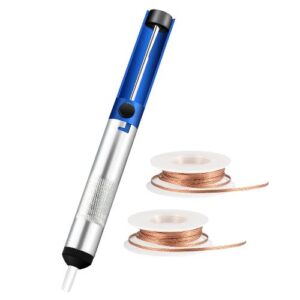
OMorc Desoldering Wick, Solder Sucker, and Solder Braid – Best Solder Removal Kit
 The Omorc Solder Sucker is a handy tool with plenty of sucking power. Its durable aluminum-bronze frame prevents it from warping under the intense heat of melted solder. Even the plastic tip holds up well when exposed to extreme temperatures.
We love that the Omorc comes with a braided solder wick. This low-tech solder removal tool is perfect for cleaning up hard-to-reach places. It is made from oxygen-free copper wire. As such, you can skip the flux during the cleaning process.
If you’re looking for an affordable solder removal tool for small jobs, the Omorc is a great pick. You can easily operate it with one hand. In most cases, the vacuum is strong enough to remove an entire area of melted solder in one fell swoop. Overall, its an ideal kit for small home-based soldering operations.
Pros
- Durable aluminum bronze frame
- High-pressure vacuum
- Comes with solder wick braid
- Oxygen-free copper wire for hard-to-reach places
- Lightweight and portable
Cons
- Plastic tip
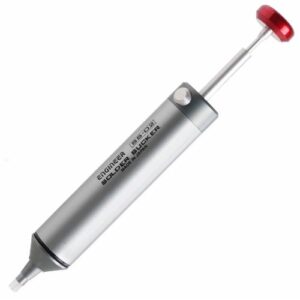
Engineer SS-02 Solder Sucker – Best Midrange Solder Sucker
 If you want solder sucker that can power through nearly any situation, then be sure to check out the Engineer. This impressive device offers more suction than both of the previous suckers combined. What’s more, it boasts a durable metal shell with a soft silicone tip.
The tip conforms to the surface of a circuit board, creating a tight connection that leaves no soldier behind.
We love that the Engineer is small and lightweight. It’s percise body enables users pull off one-handed maneuvers. The device can even withstand direct contact with a soldering iron. Most customers found the Engineer to be reliable. The only downside to the Engineer is that its silicone tip is sometimes develops clogs.
Pros
- Compact and portable
- One-handed operations
- High-quality metal construction
- Soft silicone nozzle
- Heat-resistant components
Cons
- Tip clogs easily
Greenlee 1700 Desoldering Tool With Standard Tip – Best Push-Button Operation
 If you’re tired of manually pumping up solder, then this push-button sucker will be your saving grace. It boasts a durable metal frame with a replaceable plastic tip. With a variety of replacement tip options, this solder sucker can eradicate unwanted solder on everything from circuitboards to jewelry.
If your someone who solders frequently, the Greenlee is a long-lasting, durable solder removal tool that you need to try.
Many customers are impressed with the strength of the Greenlee 1700’s plunger. It can eradicate large areas of unwanted solder in just a matter of seconds. Unlike inferior solder suckers, the Greenlee never clogs. What’s more, it won’t buckle or warp after being exposed to a hot soldering iron.
Pros
- Push-button solder removal
- Standard, regular, and anti-static replacement tips
- Durable metal frame
- Warranty
- Some production issues
Cons
- Tip clogs easily
Tabiger Solder Wick & Desoldering Pump – Editor’s Pick
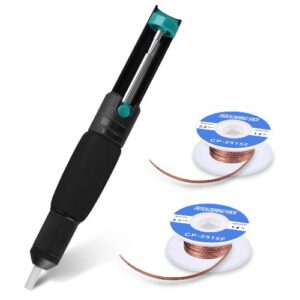
 Every solid soldering kit needs a desoldering pump. The Tabiger Solder Wick & Desoldering Pump just happens to be one of our favorites. This impressive little device removes solder with the click of a trigger. One push of the trigger engages the sucker’s powerful internal pump.
When you are finished with the pump, you can use the complimentary copper braid to pick up any remaining residue.
The Tabiger Desoldering Pump features a durable ABS body and a heat-resistant nylon tip. It also boasts a covered non-slip sponge that serves to absorb excess heat and sweat. With all of these added protections, the Tabiger is perfect for extended soldering sessions.
Pros
- Durable ABS body
- Slip-resistant covered sponge grip
- Push-button trigger
- Powerful suction
- Heat-resistant silicone tip
- Long service life
Cons
- Weak wick
Weller 7874B
On the market, you can find a wonderful model desoldering pump without overpaying.
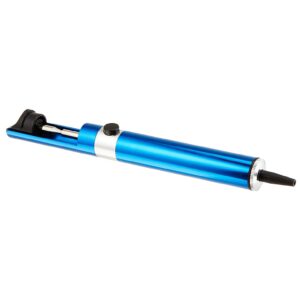 Hobbyists and professionals use Weller 7874B. Due to its simple and efficient use, it belongs to the standard equipment in both smaller workrooms and on large construction sites.
This mechanical desoldering pump has a tip that is heat-resistant. In addition, the solder does not adhere to this material. Moreover, it has antistatic housing what allows you to work with the pump without worries.
The desoldering pump can be composed of a cylinder with an integrated piston, which you can tension and release with a helical spring. You release the spring at the push of a button and thus create a vacuum, the liquid solder is sucked up and collects in the cylinder of the pump. There it cools down and solidifies again so that it falls out when the spring is tensioned again.
This desoldering pump impresses with its high suction power, with which you can remove solder particularly thoroughly. At the same time, its tip is made of Teflon, so you do not have to worry if you come into contact with the soldering iron. It can also be easily unscrewed if you want to remove the sucked-in solder and then reassemble it reliably.
Due to its high reliability, this desoldering pump is the ideal addition to your toolbox if you are looking for a desoldering aid. Weller 7874B sits comfortably in the hand and has a tip that is large enough to process larger soldered joints.
You do not have to store the Weller 7874B pump in any special way. If you simply place it with the rest of the tools, it will stay in good shape for a long time. If you rarely use the desoldering pump, it can be a loyal companion for a long time. If you use it for a large project or even every day at work, you will notice signs of wear and tear earlier.
Pros
- It is suitable to deal with wires, component removal, circuit boards, etc
- Customers do not find it difficult in cleaning
- It does not require a lot of space
Cons
- The plastic tip is too big, which creates unwanted space where the solder is stuck
Kotto Solder Sucker
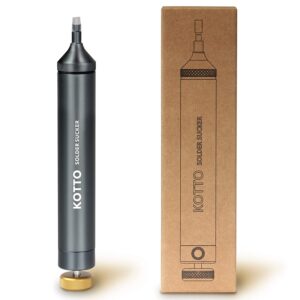 The Solder Sucker from Kotto has an innovative silicone nozzle. In direct contact with the soldering iron, it can withstand temperatures of up to 842 degrees Fahrenheit.
If necessary, the nozzle can be cut to size so that it seals optimally even when positioned at an angle. The silicone tip can be exchanged with nozzles cut from a special hose. The unit is made of aircraft 6061 aluminum. With such housing, the desoldering pump does not weigh a lot and it sits comfortably in the hand.
Kotto Solder Sucker is suitable when you deal with small details and use not much tin. It can be operated even with one hand what makes the soldering process very effective. It consists of a cylinder with an integrated piston that can be tensioned and released with a helical spring. Loosening the spring creates a vacuum that sucks up the liquid solder. It is then collected in the cylinder of the desoldering pump. As soon as it has cooled down, it can be ejected without problems.
Pros
- It has a small size that easily fits into hands
- Due to the plunger and trigger button, you can operate the desoldering pump with one hand
- The mechanical desoldering pump does not require any heat and wires to perform
Cons
- It stores very little tin, which means that frequent emptying is necessary
Buyer’s Guide
Start with solder wick, which is a fine braid of copper strands that have been coated with flux. Capillary forces cause molten solder to wick into the braid. Most metals develop an oxide layer when exposed to oxygen that repels solder. This process gets worse at higher temperatures. The flux cleans off the oxides so the solder will adhere to the metal and be drawn into the braid.
How to Choose a Solder Sucker
Bulb Solder Suckers
Bulb suckers consist of a rubber bulb and a small pipette. You squeeze the bulb to suck up unwanted solder. This is the crudest and most inexpensive type of solder sucker on the market.
Plunger Solder Suckers
Plunger solder suckers feature a spring-loaded suction system. They are typically pen-shaped. In most cases, desoldering plungers feature triggers or buttons that can be operated with one hand. The plunger sucks unwanted solder into a small reservoir. When the reservoir is full, it must be opened and emptied. Plunger suckers are the best pick for home-based soldering stations.
Vacuum Solder Suckers
Vacuum solders are electrically powdered. They are the most expensive and industrial solder removers. As such, they are typically used in professional soldering situations.
Desoldering Braid
Some desoldering kits come with a role of copper desoldering braid. This twisted copper wire is sometimes covered in flux. The wire is used to lift unwanted solder offer of circuit boards. It is a disposable item. Desoldering braid is great for tackling unwanted solder that is located in hard-to-reach places.
Frame
Most solder suckers feature a small cylindrical frame that houses a mechanical pump. The frame is typically made out of metal or plastic. A solder sucker’s frame needs to durable and resistant to heat. You don’t want it to warp after coming in contact with hot solder or a soldering iron.
Tip
Solder sucker tips are typically made from nylon, silicone, or plastic. These materials wear easily but are flexible enough to create a tight seal on a circuit board. Opt for a solder sucker with a heat-resistant tip. Silicone tips are some of our favorites because they form a tight connection. On top of that, they can handle quite a bit of heat.
Power
A solder sucker needs to muster up enough suction to lift heavy pieces of molten solder. A powerful spring-action plunger should do the trick. A good suction system won’t leave behind solder residue.
Ergonomics
Being that you will also be handling the device around high temperatures, it’s also important that it is easy to hold and control. We strongly advise you to purchase a sucker with a slip-resistant grip and an ergonomic trigger. This way, you can eradicate unwanted solder without straining your hands or coming within harm’s way.
How to Desolder Joints
To desolder a joint, first cut off any used portion of the wick and when you use the wick, be sure to hold it by the bobbin as heat transfers quickly through the copper. Then add a small amount of solder to your iron tip. This bit of solder helps to transfer heat from the iron to the wick, acting as a heat bridge. It may seem counterintuitive to add solder to the iron when you’re trying to remove solder, but without this, it’s much harder to get the process started. Heat doesn’t travel well through a dry contact.
Hold the wick over the joint and gently press the iron on top of it. Continue holding the wick on the joint for several seconds to make sure all the solder is removed. This particular type of joint is very easy to desolder. It’s on what’s called a single-sided board and only has metal on one side. In contrast, many PCBs are two-sided and have plated through holes.
If you look up close, there’s still solder remaining between the pin the wall of the tube. Since this part has many pins, you need to make sure each one is completely free before trying to pull the whole part out, to avoid breaking a pin or a hole. Using a small screwdriver or pick, push gently to try to break the remaining connection. Make sure the pin is completely free.
Video Tutorial: How To Desolder Electronic Parts Using Different Tools
If you can’t break the remaining solder connection, you may need to do more wicking. If you have access to the component side of the board, try applying the wick there too. Note that you have to add solder to your iron tip before using the wick each time.
Typically a leg will be pressed against one side of the hole. It can be helpful to apply wick on that side to try to remove the solder stuck behind the pin. Once you’ve removed as much solder as possible, try again to break the remaining sweat joint with a screwdriver or by wiggling the part.
How to Use a Solder Sucker
The next tool you have to use is the manual desoldering pump or solder sucker. To use this, first press down on the spring loaded plunger. Then align the nozzle over the joint to be desoldered and heat up the joint with the iron. Once it’s molten, pull the iron tip out, cover the hole with the nozzle and press the release button to activate the vacuum. The timing of this can be tricky as you need to engage the vacuum while the solder is still molten.
If you can touch the joint on the other side of the board, it can be much easier to heat that side while holding the solder sucker on the other. This removes the timing challenge.
Try to break any remaining solder connection by pushing on the pin. If there’s too much solder remaining to break the pin free quickly, you might have to use wick to clean up what’s left. If you don’t have any wick, it’s sometimes easier to resolder the hole and try again rather than continue to use the solder sucker on the mostly empty hole. If the joint is mostly empty, it will be difficult to get the remaining solder completely molten with the iron and also difficult for the solder sucker to create much of a vacuum.
Some joints are much more difficult than others to desolder. For instance, when you have a small hole with a very small clearance. Also, when a hole is attached to a ground plane, it can be difficult to heat up the joint sufficiently. A large component, like a capacitor, also adds to the heating requirements.
How to Use a Desoldering Gun
If you only have a wick or a solder sucker, your best bet is to use a higher temperature setting. Unfortunately, the higher the temperature and the longer the duration of desoldering operation, the greater the risk of damage. For cases with large ground planes or boards with four or more layers, a preheater can be used with a stand like this to warm the entire board before applying heat with an iron. Another difficult condition results from poor quality boards.
For all of these tough cases, or if you need to do a lot of desoldering, a desoldering gun is an ideal tool. It has an integrated iron and triggers activated vacuum pump. To use it, first, make sure there’s a good amount of solder on the joint to help heat transfer into it. Consider adding more if the joint is very small. Adding some flux at this point will also help.
Bring the gun down on the joint and wait for the solder to melt. Once it does, start moving in a circular pattern but avoid pushing down on the pad. Then activate the vacuum. Continue moving the tip in a circular pattern to help clear solder from all sides of the pin and then lift up the nozzle. The air and circular motion will help prevent the pin from refreezing to one of the sides. When doing ICs, it’s a good idea to skip pins to avoid thermal buildup in part.
Alternative Methods to Desoldering
Finally, some alternative methods and a few more tips. With solder wick, it can be very easy to damage a pad by moving the wick after it has frozen to the board. But many times, you can remove components without first removing the solder. For elements with nearby leads, you can heat both at once with iron and simply pull the part out. On resistors, you can pull one leg out at a time. For components with more than two leads, a hot air tool could be used to get all pins molten at once.
A special low melting point solder called Chip Quik will let you do the same thing with a regular iron. Just melt in some Chip Quik into every joint, alternate between each joint to keep them all molten, and then pull the whole part out. The Chip Quik allows you to keep every joint liquid all at once.
If you’re willing to sacrifice the part, cut each leg, remove the part, and then pull each leg out individually. It’s a lot easier to clean the hole that doesn’t have a lead in it.
Many of these approaches will be faster and pose less risk to the board than trying to desolder each pin individually.
FAQ About Solder Suckers
Why does my solder sucker clog?
It’s important to remove solder immediately after you’ve sucked it up. If you don’t, the solder will harden inside the tip and plunger.
What should I do if my solder sucker leaves solder residue behind?
Desoldering braids are engineered to pick up what solder suckers leave behind. Many solder suckers even come with a complimentary role of the desoldering braid. This twisted copper wire is perfect for reaching into tight places that solder suckers can’t access.
What should I do if the tip of my soldering iron melts?
Most budget-friendly solder suckers don’t come with tips that can handle lengthy desoldering sessions. With that said, silicone is one of the most durable and long-lasting materials used to make solder sucker tips.
How should I discard of my old solder?
Some people recycle their spent solder. They do this by melting down the old solder and creating new bars with it. If you’re not this savvy, discard the old solder in the trash.
How much do I need to spend to score a reliable solder sucker?
Modest solder suckers cost no more than $10. Meanwhile, industrial models range between $20 and $40. If you’re looking for a sucker you can use at home, $25 is a reasonable budget.
Final Thoughts
We hope you enjoyed our top five solder suckers! These small, yet mighty devices make it easy to remove unwanted solder. Quite frankly, we cannot imagine soldering without a solder eraser nearby! If you are looking for a budget-friendly sucker that won’t melt after a single session, the Tabiger solder sucker is a great option and our editor’s top pick. Meanwhile, the Greenlee is a great upgrade for home soldering setups that get a lot of use. Of course, any of our five picks will get the job done.

This is a good collection of five solder suckers. Desoldering can be quite the hassle without the appropriate knowledge and tools, so investing in a dedicated solder sucker is a wise move. I ordered a basic one off of Amazon and it has done the job a few times now.
A solder sucker is really useful, and learning how to remove solder is important for any soldering project. Your buying guide for desoldering joints is particularly helpful in that regard and spot on. I have a basic desoldering pump in my toolkit. I would certainly recommend starting with something simple.
Hello, thanks for your comment!
Tabiger makes a great solder sucker.