Customer’s Choice: the Best Rated USB Oscilloscopes
[survey_answers id=”719036823″ style=”plain” data=”score”] users answered this survey. Please help us improve this review!
[survey_answers id=”719036823″ style=”piechart” legend=”true”]
A USB oscilloscope is what you can have if you really need a good and portable scanning device for your vehicle/project. Luckily, the cost of quality USB o-scopes has been on the drop for some time now, so you don’t necessarily have to have to invest a lot when buying one of such gadgets.
Relatively small PC-based USB scopes can be a good choice, and they do feature a host of features that will give you the efficiency, accessibility, portability you need and cost-effectiveness you need as a vendor.
A USB oscilloscope is very similar to a digital oscilloscope (DSO), but the only distinction is that this oscilloscope can now be used to display data on your PC with a suitable USB cable link.
Reasons to buy a USB oscilloscope:
- Precise scanning;
- Budget-friendly;
- The data can be displayed directly on a PC without delays;
- Small size, portability;
- Easy to use even for beginners;
- User-friendly interface;
- A full oscilloscope potential;
- High bandwidth;
- Multiple features;
And the following guide focuses on some of the world’s best USB oscilloscopes. Compare the major specifications and the tips for buyers before buying a new device in this category.
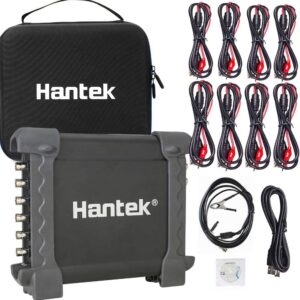
Hantek 1008C+ 8CH Diagnostic PC Oscilloscope – the best for versatile options!
 The 8-channel Hantek 1008C+ computer is an adaptable machine developed to analyze and conduct a range of tests in the automotive industry.
It is primarily built for cars and is one of the robust and versatile solutions available for vehicle mechanics. It is fitted with a strong exhaust of an ignition and gas analyzer. All 8 channels make it possible to see analog signals from the camshaft, the crankshaft, and other measurements.
With the USB 2.0 protocol, this device uses a sampling rate of 2.4MSa/s. While smaller than the sampling rates previously mentioned, this is compensated for by a high sensitivity on both the horizontal and the vertical axis.
Pros
- Affordable;
- Capable of observing all engine cycles;
- Over 80 features are supported;
- Included 8x alligator clips;
- 8 channels;
Cons
- Not fully compatible with Windows 10 OS;
It could be a perfect vehicle scan instrument. It retains the power to view all waveform cylinders concurrently.
Aiteme Tablet Oscilloscope Kit – the best for portability!
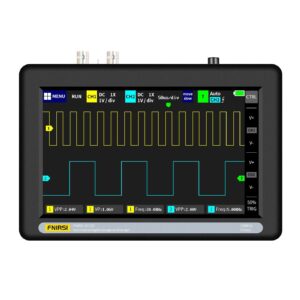
 The Aiteme tablet o-scope can be attached to your monitor and features a color screen, making it suitable for those who need a more functional device.
The portable unit has a designed 6000mAh high-performance Li-ion battery that lasts for 4 hours at a single charge. The TFT LCD color monitor is an excellent 7-inch display for easy viewing with a strong contrast resolution of 800×480. This tablet even has a USB port so that you can attach it to other computers or attachments.
Pros
- The battery may last up to 4 hours;
- Colored and high-resolution LCD;
- Small and lightweight;
Cons
- The battery charges for 5 hours;
- Accuracy issues;
This model has a high-voltage safety function that avoids burnout and other injuries when you’re operating. You may also take a screenshot and use Auto Settings for features that you also use.
Digilent Analog Discovery 2 USB Oscilloscope – the best for computer diagnostics!
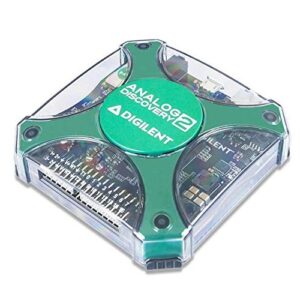
 Analog Discovery 2 by Digilent provides a number of available scope choices, and it’s easy to zoom in on some areas of the waveform.
The usb oscilloscope is perhaps the most important instrument in this kit to test repeat signals, as you might assume.
Time divisions can be chosen from the drop-down menu, or you may zoom/expand via the mouse wheel or the right mouse button. The left button will drag the waveform to the left and the right to adjust its location.
There are two channels used for measurements. Although the rates of 100MS/s and 30MHz are definitely not the highest in the sector, they are more than satisfactory in certain respects. There are a broad variety of features and auxiliary displays accessible, such as calculations, recording, zoom screen, and audio quality. Where you might find an improvement over the dedicated scopes is how much it is blended into the computing context.
Pros
- Designed for PC diagnostics;
- Many powerful features;
- Good build quality;
Cons
- Pricey;
- Unreliable default software;
- Linux instability;
You can program this computer using JavaScript, and there’s also a software creation kit that allows users the opportunity to build custom PC apps. There is a wide range of import and export features, and you may still take a screenshot of something you need to recall later.
Pico Technology Picoscope 2406B USB Oscilloscope – the best for the advanced display!
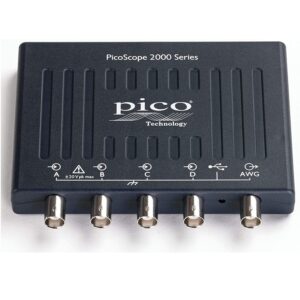
 This 4-channel Pico o-scope has a conscientious front-end configuration which eliminates harmonic distortion, noise and crosstalk. Years of expertise in developing o-scopes can be demonstrated in increased bandwidth flatness and low distortion.
Both PC applications and firmware inside this scope may be upgraded to secure your investment.
One of the main variations in utilizing the lens of Pico scope is the display. After a few minutes of seeing waveforms on your laptop or computer, you won’t want to go back to a cramped, cluttered, low-resolution panel on your screen.
The software dedicates almost the whole viewing region to the waveform. This means that the full volume of data is recorded at once.
Pros
- Sophisticated display;
- Can be controlled by touchscreen, keyboard or mouse;
- Easy PC connectivity;
- Simple to use;
- Portable;
- Signal integrity;
Cons
- Can measure only to 20 Volts;
- Always requires a PC for testing;
This computer also has dedicated hardware to prevent overloading of the PC CPU or USB interface when deep memory is allowed. The hardware amplification engine essentially produces a waveform representation that can be viewed on the Computer panel. Deep memory is better handled than rival o-scopes, both PC-based and benchtop models.
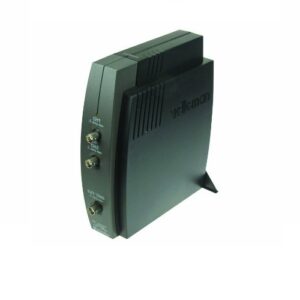
Velleman PCSU1000 Two-Channel USB Oscilloscope PC-based – the best for Windows software!
 The Velleman PCSU1000 2-channel USB range is very useful for debugging and diagnosing your car. The price for this selection of devices is also promising.
This o-scope is attached to your device on the USB connection, and you need to run the program to start collecting waveforms. It’s marketed as a 60 MHz device, and it really provides such a range.
But the first thing you ought to bear in mind is that it is not a high-frequency analog spectrum.
It offers many features for a decent price. For instance, the device is fully compatible with Windows OS versions.
Pros
- Decent price;
- 2 channels;
- Compatible with Windows/Linux OS versions;
- Good USB connectivity;
- A full-fledged instrument;
Cons
- Poor community support;
- The signal issues are possible;
This gadget has a wide set of functions that you might anticipate from any separate mid-level o-scope that would cost 10x as much.
The Buyer’s Guide
USB vs digital device
This is going to be a major part of the choice. DSOs with their displays look pretty cool. They still eliminate the need to link to the PC, but they still sacrifice accessibility. USB o-scopes are much easier, but if you just dip your toes into a hobby and don’t really know if you’re going to need a ton to warrant the additional expense, then it’s certainly worth going for a USB model.
Trigger modes
It involves triggering and getting the job of initiating a test. You may verify from this parameter what triggers the scan to start, or also whether there are any abnormalities. There are three simple trigger settings for each oscilloscope. Single: the scan takes place just once and thus at the first cause event. You need to click the right button to enable recovery to wait for another one.
Typically, there are 2 major trigger modes you may find in USB oscilloscopes:
- Automatic – the scan restarts without the trigger;
- Normal mode starts when the scan is triggered directly;
The sampling rate
It is the regularity of which the waveform components are seen by the o-scope. It determines how informative the details you will see will be, and how precise the information will be interpreted by the o-scope.
Similar to the camera’s frame rate, the larger the sample rate, the more accurate the data would be, enabling you to record even the slightest shifts in the waveform.
But, when you’re searching for an o-scope, make sure to consider the sampling rate, from the lowest sampling rate to the limit.
Although a high sampling rate has its advantages, a minimum sampling rate must also be known, in case you need to examine signals that are steadily evolving over a long period of time.
And as a side tip, you should use the rule of five to guarantee that the oscilloscope sampling rate is at least 5 times that of the peak frequency of the project you’re focusing on.
Bandwidth
Depending on the form of use for your scope, you will need to keep a close eye on the bandwidth spectrum since it defines the capacity of the oscilloscope to show the signal precisely.
If the frequency of the signal rises, the power of the oscilloscope to calculate the signal reduces precisely.
And thus, the wider the bandwidth spectrum, the higher the frequency you will analyze.
Therefore, in the same manner, as the sampling rate, you can use the rule of five to guarantee that the bandwidth of the oscilloscope is wide enough to calculate at least 5 times the bandwidth range that may be needed for the calculation.
This may also allow you to locate the definitive 5th harmonic and, thus, to decide the form of the signal.
Memory capacity
When you’re looking through the capabilities of a scope that you plan to purchase, be sure and keep an eye on the processing space it has, and even though it has a high sampling rate, it only implies that it uses further memory when capturing signals.
You can also ensure that the o-scope has enough memory space to capture the appropriate signal.
The probes
These are essentially the very devices that enable the USB oscilloscope to conduct accurate measurements.
And even a scope with a high sampling rate as well as a wide bandwidth will not be of many benefits without them.
However, it doesn’t mean that a single probe should be used for an o-scope. You should make sure that all attached probes are of the same range and are compatible with both the sampling rate and the bandwidth.
Number of input channels
The amount of outlets that the o-scope carries is what defines how much information it can handle and what plays such a significant part in pricing.
Bearing in mind your budget, make sure that you see if the oscilloscope you wish to purchase has an appropriate number of channels to enable you to conduct tasks that you need an oscilloscope.
Software
USB o-scopes take on different types of waveform properties depending on the signal that is obtained on the probes attached to some piece of equipment to test.
These properties vary from frequency, time period, amplitude, vibration, and several others. Taking the USB oscilloscopes via the probes, they are then extracted and sent to the PC via a USB link.
They can also translate sound and vibration signals to electrical impulses, which can then be conveniently viewed on the panel of your PC or the built-in screen of certain oscilloscopes.
In addition, due to USB 2.0 connections, you may also move data at an impressive pace. You can instantly grab and save waveforms to a computer where we theoretically have plenty of room, taking into consideration the amount of external storage gadgets that you can have.
Video Tutorial: 2CH 100MHz Fnirsi Tablet Oscilloscope Review
[embedyt]https://www.youtube.com/watch?v=5iwtDwJlbWk[/embedyt]Final thoughts
The gadgets mentioned above are some of the better USB o-scopes you will find on the U.S. market. And now you know what to check when buying a USB oscilloscope. Make sure to test the device (if possible) before making a final decision. Or, at least, read a few unbiased reviews of each specific model.


I love USB Oscilloscope because it’s so easy to use. I plug my scope into the PC and create professional-looking waveforms in minutes!