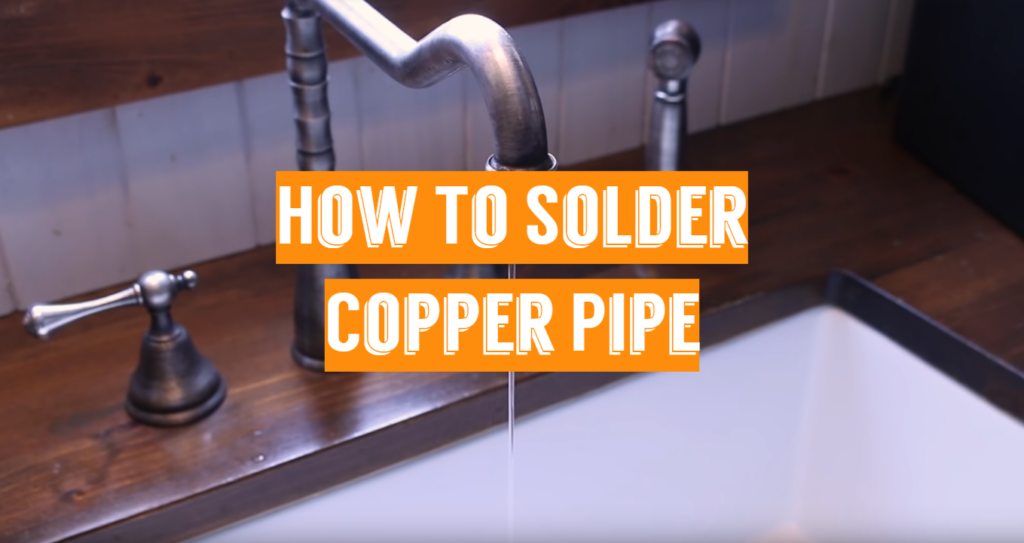
Guide
The number one enemy of achieving a leak-free professional joint is water. Remove as much water as possible by bending the tubing down. If there’s still standing water remaining, you can use the torch to boil it off. Determine the length of tubing needed with a measuring tape and cut to length with the tubing cutters.
It is recommended to practice a few joints before taking on a project. This will get you comfortable with the heat, solder, and techniques. Just remember not to get frustrated and that the prep is the most important part. Taking the time to dry, clean and properly flux the connections will make the difference between a joint that will leak and one that’ll last a lifetime.
A burr will be created on the inside of the pipe from the tubing cutters and can create turbulent flow and premature wear of the copper and fittings. It is important to remove this burr with an inside tubing reamer. Any copper surface which comes in contact with each other must be cleaned and fluxed. The tubing is clean with the grit cloth, and the fitting or female end is cleaned with a suitable brush. This is three quarter inch copper, so a three quarter inch fitting brush will be used. You are looking for a shiny bare copper look. Careful not to touch the clean copper surface, as the oils from your gloves or hands will contaminate the joint. A clean cloth can be used to wipe the copper dust away.
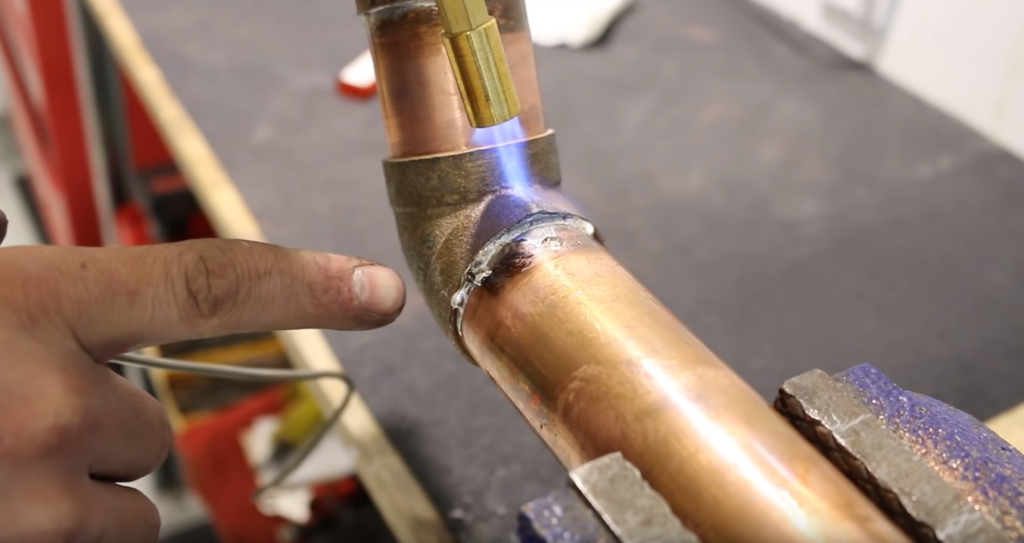
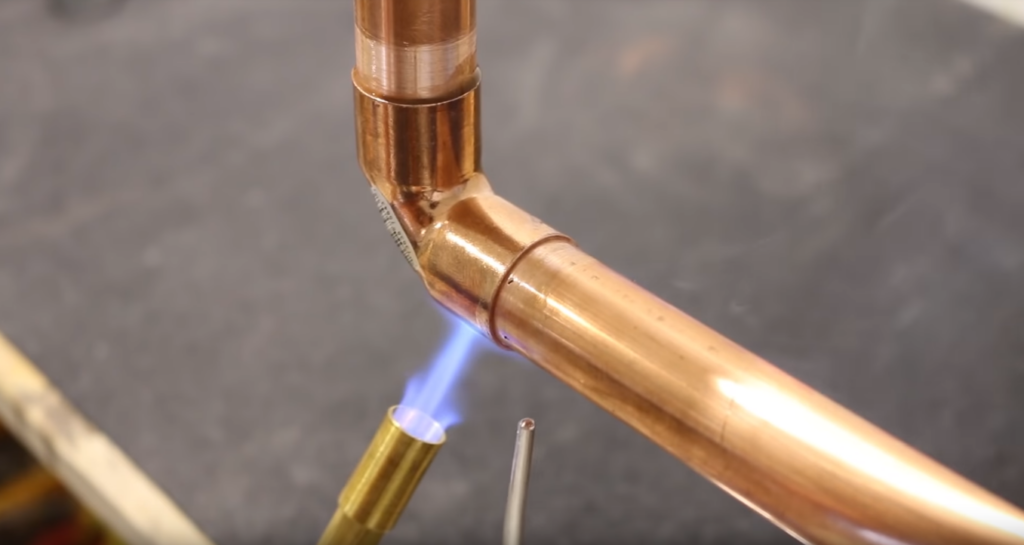
Apply flux to all the mating surfaces in a thin, even coating. Before getting started, pull out a small amount of solder. Apply heat evenly around the fitting connection. The solder will follow the heat. This is why it’s essential to heat the suitable or female connection so that the solder will be drawn into the fitting using capillary action. Use the copper tubing and not the flame to melt the solder. Test to see if the copper is hot enough every few seconds by tapping the solder against the joint. Careful not to overheat the fitting as this will burn away the flux causing the solder not to flow properly.
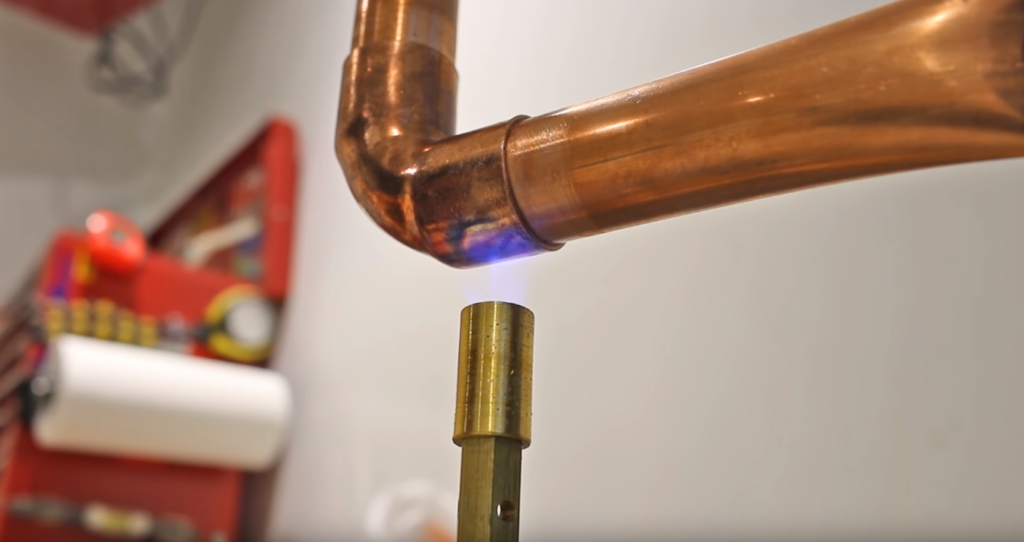
A rule of thumb is using the same amount of solder as the diameter of the pipe being soldered per joint. This being three quarter inch copper, each joint should take a length of three-quarters of an inch of solder. After the joints are completed. Allow the copper to cool naturally. Cooling the connections too fast can cause fractures in the solder. After the copper is naturally cooled, wipe the joint with a damp cloth. This removes any flux residue on the pipe and fittings. Failure to wipe the joint will cause the area which has flux residue to turn green. This is a great time to inspect the joints as well.
Common Mistakes
The first example would yield the same result if too much heat was used, not enough flux or in properly cleaned fittings. The second most common mistake that is using the flame to melt the solder instead of using the heated copper.
Pro Tips
It is recommended to practice a few joints before taking on a project. This will get you comfortable with the heat, solder, and techniques. Just remember not to get frustrated and that the prep is the most important part. Taking the time to dry, clean and properly flux the connections will make the difference between a joint that will leak and one that’ll last a lifetime.
How To Solder Copper Pipe – FAQ
How hard is it to solder copper pipe?
Copper is quite a reliable material. A lot of people use such pipes to deal with various tasks. It is important to know and to be able to create a decent soldered connection between the copper pipe, bends, and fittings. To start soldering copper pipes it is better to get to know more about techniques and information on how to do that. In case you plan to do soft and hard soldering you should start with cleaning the oxides. Simply, you make the metallic surface bare and ready for soldering. There are various options of cleaning including metal-free cleaning fleece, properly grained emery cloth, or ring. There are also round brass or stainless steel brushes with bristles that you can use.
While dealing with copper piper it is common to use a capillary technique in soft or hard soldering. The soldering gap must therefore be uniform on the one hand. On the other hand, a capillary effect occurs, when the solder goes through the gap between the pipes when it has to be soldered against gravity. Thus, you will not find it very difficult to solder copper pipes when you have all the needed equipment and materials.
Why is the solder not sticking to the copper pipe?
There are various reasons that may cause solder not to stick where it is needed. One of the reasons is the lifespan of solder. In case it is too old you will not receive the same effect. You should also take care of the soldering tip and clean it regularly. You may not receive enough temperature due to oxidations on iron.
When you want to connect copper pipes you need to the operating temperature. If it drops down you will not be able to accomplish your task. Moreover, there can be temperature-sensitive components that require more time to solder together. You should clear the soldering iron often. You can even rub it down when it is hot with the help of a wet sponge. Tough oxidations can be cleared with sandpaper or a sanding sponge. They easily deal with dirt and rust.
Another option is to use smearing solder grease on the board. You can also use some water where you will be performing soldering and clean it with a brush. Sometimes you just need to get a new flux and not waste time and efforts on trying to revive the old one. Nowadays, it is very easy to get various types of fluxes.
Do you need flux to solder copper pipe?
For soft soldering, the soldering paste or flux as well as the solder (full solder without flux, especially when soldering drinking water pipes) you need flux. While preparing the pipe for soldering you should clean the copper pipe and fit (inside) brightly. It can be done with fleece. The copper pipe is then ground to the length of insertion with the fleece to a bare metal finish. The fittings are polished and cleaned accordingly on the inside.
After that, you apply flux. In most cases, it is in a kind of paste. This is only applied to the outside of the copper pipe, i.e. not inside the fitting. Make sure that it is applied evenly.
Does flux damage copper pipes?
On the market, you can find various fluxes and all of them are suitable for soldering. However, when you deal with copper pipers, it is not that simple. Most of them have acid components, which may cause corrosion. Therefore, flux has to be properly cleaned after the soldering.
One of the options is to use water-soluble flux. They are not that acid and can be easily washed with water. Even after such cleaning, it is still recommended to wipe the area of flux application with a cloth.
Does plumbing solder flux go bad?
Most fluxes have their expiration date. As they contain acid ingredients, flux evaporates and becomes not usable for further soldering. Speaking about the plumbing solder flux situation is a bit better. If you keep it properly sealed, such flux can still work properly even for many years. If you have such flux, it is recommended to try it on a small part before working on the main piece.
How long after soldering can you turn the water on?
Only the high difference in temperature can cause damage to copper pipes. However, soldering usually performs in some places it and heat rapidly speared over the entire pipe. Thus, around 30 seconds is enough time to wait before turning the water on.
How do you fix a copper pipe leak without a joint solder?
There are different ways to fix copper pipe leaks without soldering. One of them is anti-leak tape. Easy to use and inexpensive, the anti-leak tape will be your friend if your copper pipe is not too damaged. Turn off the water first, and dry the area to be repaired with a dry cloth. Place a piece of anti-leak tape over the problem area. Go around the entire pipe or pipe. Wait a moment for the tape to take its place, then connect the water and test your repair.
Cold welding is also a solution. You should be aware that cold welding does not replace hot welding in terms of quality. If the affected area is under pressure or is used to lift objects, then proceed directly to heat welding. First, choose the right solder to repair a copper pipe. Turn off the water, then clean the parts to be assembled with a specific product (a degreaser), and remove any impurities with a sanding sheet or steel wool.
Take a pair of protective gloves and prepare your mixture, carefully following the cold weld manufacturer’s instructions. These depend on the model you have chosen in-store.
Spread the mixture over the damaged area without skimping on the amount. Then pass a cloth over the material that you could have deposited in excess. Once the mixture has dried, hook up the water and check that your repair worked.
I’ve been trying to get into welding and soldering for a while now and found it extremely hard to find useful resources on the internet for this specific niche. I think there is a decent amount of money to be made in it and have been looking for guides. Your website is fantastic and I’ve already learned so much about soldering and welding already!
Hello, thanks for your comment!
Soldering copper pipe can be difficult for those who don’t understand the process or how to go about doing it. Regardless, I think you did a great job explaining how to solder these types of pipes.
It must be really nice to know how to solder copper pipe. I wish I was more of a “handyman” type and could do this… do you think it would be easy to learn? I have read through your steps on how to solder copper pipe but I still feel like I don’t have a lot of confidence. Thank you.