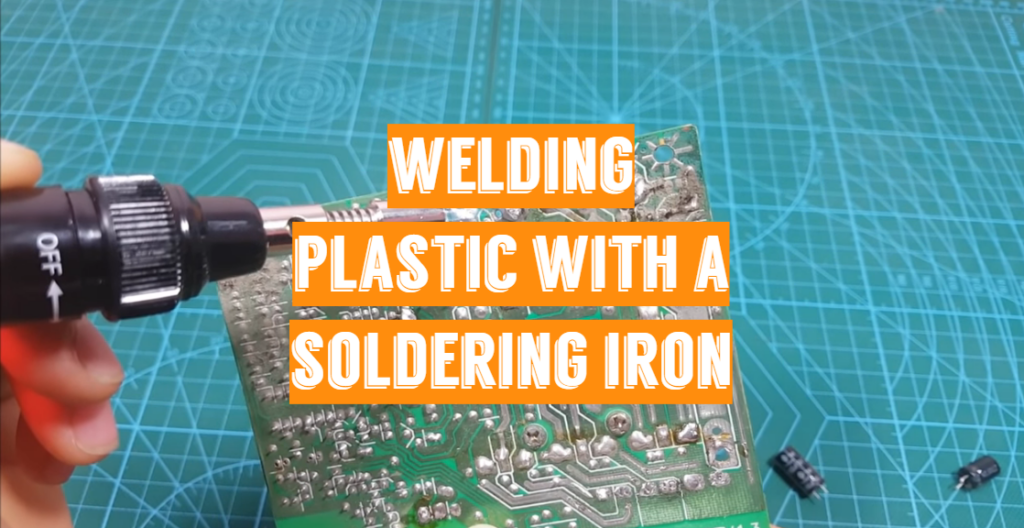
Most people replace an object’s plastic covering as it cracks or breaks into pieces; nevertheless, plastic is surprisingly malleable and simple to melt and reassemble with a soldering tool. Although the restored item would not appear precisely like it did when it was fresh, with experience, nice plastic welds that are not visually noticeable may be achieved.
How to weld plastic with a soldering iron: a step-by-step guide
Tips for users: Until you attempt the first weld, practice on discarded plastic and figure out how long you’ll need to press the iron on different points in the plastic.
- Clean the plastic properly with soap and degreaser, even though it doesn’t seem to be filthy. Sand the plastic’s edges smooth because they aren’t jagged. After that, you’ll need to plug in the iron and wait for it to warm up, which should just take a couple of minutes;
- Press 2 pieces of plastic together and keep them in place by running the soldering iron tip over the seam until it is partly melted together. Change the bits of plastic when they are already hot and detachable so that they mesh together as much as possible;
- Apply tiny bits of plastic to the seam, preferably thin sheets, to reinforce the weld. Then, using the soldering iron blade, thoroughly heat these fragments of plastic until they are liquidized. With the soldering iron blade, disperse the liquefied plastic around the duration of the seam;
- The final move is to use the soldering iron to go over the seams and the surrounding plastic in fast, smooth strokes. You should be able to produce an even, smooth plastic weld after some experience with this technique;
- Allow the plastic to cool for at least 5 minutes. Allow the plastic to cool to room temperature before continuing to operate with it. It doesn’t take long for welded plastic to cool off, so you should take your time. Keep an eye out for the soldered plastic to solidify. You’re ready to focus on it if you don’t have the heat coming off of it;
- It’s safer to patch a weld until it cools off. A strong weld seems to be reasonably neat and tidy in appearance. As required, add more welding rod or use your gun to smooth out the molten plastic;
- Using 120-grit sandpaper, sand off the welded joint. To make the weld appear just like the rest of the plastic, smooth out the rugged ridges. Rub the sandpaper back and forth over the weld with light friction. Try to make the weld appear level with the surrounding area, but be cautious not to scratch the plastic;
- Using 180 and 320 grit sandpaper, offer the plastic a final polish. To smooth out the weld, use finer grits of sandpaper. Higher-grit sandpaper is smoother and less abrasive, but if you’re not patient, it will crack the plastic. Rub the weld with the 120-grit sandpaper until it is uniform in appearance and feels soft to the touch.
Useful tips:
- Experiment first on some scrap plastic to see how long you can hold the iron on a certain spot. Each form of plastic melts at a different pace;
- Burning plastic emits noxious fumes. Wear a safety mask and conduct this operation in an open field outside;
- Often begin with the sandpaper with the lowest grit. Since it is rougher, it tears off the plastic more quickly. Save the finer-grit sandpaper for the final touches;
- You should start soldering with the temperature mark at 210-230F. Otherwise, you may burn the plastic piece;
Some of the best soldering irons you may use for welding plastic:
- Hakko FX888D-23BY
- JBC Tools CD-1BQE
- Weller SP40NKUS 40-Watt iron;
- Weller BL60MP;
- LEXIVON LX-770;
Two simple methods of welding plastic with a heat gun and soldering iron
A heat gun is much more than a paint stripper. It’s a measurable instrument for a wide range of applications. It can be used in a variety of functional implementations (many of which we’ve already discussed), as well as by hobbyists and artists. Is it any shock, then, that you may use one to weld plastic?
Despite its flexibility, certain plastics have a hard time embracing glue. The glue’s attachment is only occasional until it’s been added. Every plastic manufactured from high-density polyethylene (HDPE) or polypropylene falls under this category (PP). High heat is the only way to fully weld them together in a long-term endeavor.
You will need such things: a heat gun, a soldering iron, leather gloves, pliers.
1) Face-flushing method
Gather the components you’ll be fusing. If it’s for a design, use a design or outline to cut when desired. Otherwise, get them ready to be heated.
Soften each one of the faces in the microwave. Put your gloves on and press your hands close. It’s easy to overheat them, so it’s a good idea to train on scrap first.
Push the plastic along with a piece of sheet metal. It can increase the amount of force without fusing.
2) Spot welding method
Keep a piece of plastic (preferably in a stick form) at the edges or in between the surfaces with pliers.
Gently push the hot soldering iron against the plastic “stick” until it starts to melt.
If you’re having trouble, consider heating a screw before it moves through all materials. And heat it until the two pieces are fused.
Final thoughts
Welding plastic with a soldering iron isn’t enough for repairs: it can even be used for welding and even sculpture. If you already have a soldering gun/iron/station, you don’t need to purchase a plastic welding kit and can start welding plastic right away.
I weld plastic using soldering iron too. It is easy to melt the plastic. And it is possible to make a hole in the melted part. I wanted to make something using polyethylene bottles because I thought welding them will be suitable for my purpose. So I tried to weld them using soldering iron, and it was not so difficult as I expected. If you use a Teflon sheet on the table, melted plastic won’t attach to your table, and it can be removed easily after cooling down. Of course, you should wear gloves, a mask, and glasses while working with the molten plastic!